Get ready for a flavour explosion! This recipe walks you through making super yummy, crispy vegetable balls that are perfect for diving into either a lip-smacking dry coating or a glorious, slurpable gravy. It’s like a choose-your-own-adventure for your taste buds!
Mission Prep Time: About 30 minutes (Time to get your chop on!)
Cookin’ Time: Roughly 25-30 minutes (Patience, young grasshopper!)
Feeds: 4-5 hungry humans (Or 1 very, very hungry human… again, no judgment!)
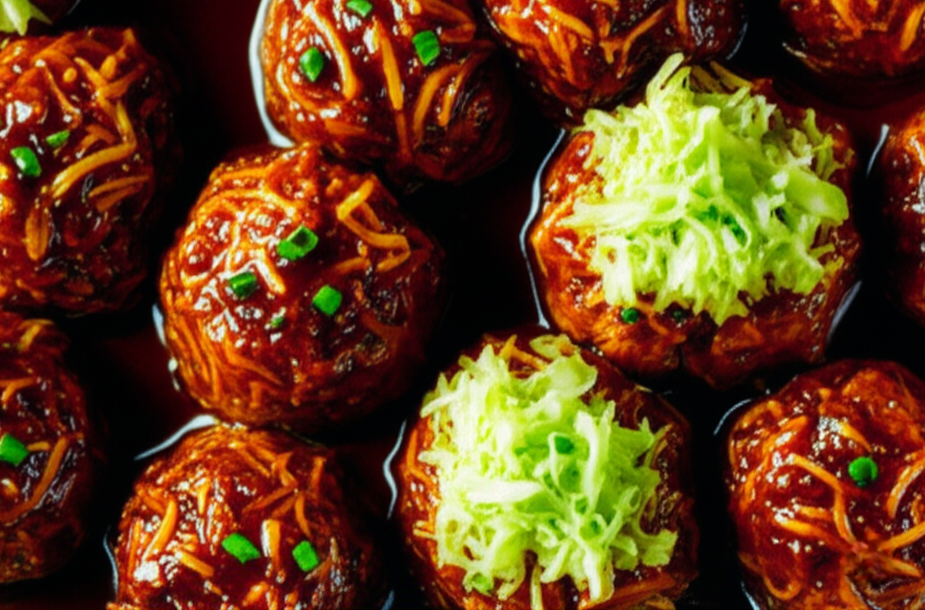
Serving suggestion: Garnish with julienned or grated, stir fried or boiled or even raw veggies (cabbage, carrots, bell peppers). They stick to the veggie balls giving them a beautiful appearance and rich texture
Phase 1: Operation Manchurian Balls (Building Your Flavor Fleet!)
Think of these as your little veggie powerhouses, ready to soak up all that delicious sauce later.
The Secret Agents (Ingredients):
- Cabbage: 1 cup, chopped up nice and fine (Our leafy foundation!)
- Carrot: ½ cup, chopped (Adds a little sweetness and color pop!)
- French Beans: ½ cup, chopped (Gives it that extra veggie crunch!)
- Fresh Coriander Leaves: 2 tbsp, finely chopped (For that fresh, zesty kick!)
- Ginger: ½ inch, tiny tiny pieces (The hidden zing!)
- Green Chili Paste: (From about 2 green chilies) (Adjust for your spice courage level!)
- Light Soy Sauce: 1 tsp (Salty umami goodness!)
- Red Chili Sauce: 1 tbsp (Bringing the heat… and flavor!)
- Butter: 1 tbsp (Makes things happy and rich!)
- Salt: To taste (Every hero needs their seasoning!)
- Sugar: Just a pinch (To balance out the flavors, shhh!)
- Corn Flour (Cornstarch): 6 tbsp (Our crispy coating magician!)
- Refined Flour (All-Purpose Flour): 3 tbsp (The binder that holds the team together!)
- Oil: Lots for deep frying (For that golden, crunchy armor!)

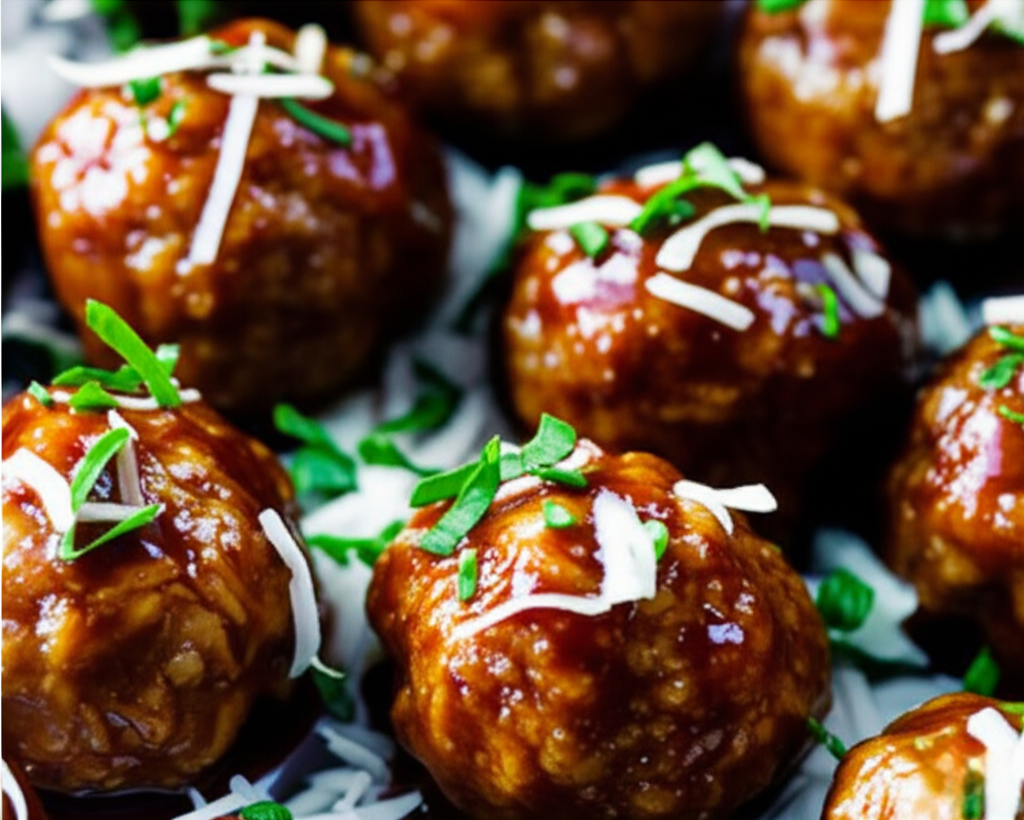
This one on top is the gravy version and the one on the bottom is the dry version where the sauce is drizzled while serving and a little bit of soy sauce could be served separately.
YouTube Video: This is an air fried version. Even if you deep fry your Veggie balls. It will make instructions easy to understand. Here it is: https://youtube.com/shorts/TZYtzkVcpXw?si=jGUy5ABXFeBFy-0z
The Secret Mission (Method):
- Veggie Party Mix: Grab a big bowl and invite all the chopped veggies (cabbage, carrot, beans, coriander), plus the ginger, chili paste, both soy and chili sauces, butter, salt, and sugar. Now, gently get your hands in there! Mix everything just enough to combine. Don’t squeeze like you’re milking a cow – we don’t want the veggies releasing all their precious juices just yet!
- Flour Power Activate: Time to add the binding agents! Sprinkle in the corn flour and refined flour a bit at a time. Keep mixing with your hands until you get a dough-like consistency that you can actually roll into balls. The amount of flour might be a little flexible depending on how moist your veggies are, so trust your gut (and your hands!).
- The ‘Can I Make a Ball?’ Test: Pick up a small bit of the mixture. Can you easily roll it into a cute little ball that holds its shape? YES! You’ve nailed it. NO? Add a tiny bit more flour and try again.
- First Dip – Getting that Outer Shield: Pour enough oil into your wok or Kadai for deep frying and crank the heat up high. Wet your fingers with water – this is your non-stick shield! Scoop small portions of your veggie mix and quickly shape them into rough ball shapes (they don’t have to be perfect spheres, embrace the rustic look!). Gently drop these little guys into the hot oil. IMPORTANT: Resist the urge to stir immediately! Let them hang out for a minute or two on high heat so they can form a nice protective outer layer.
- Second Dip – Cooking the Insides: Once they’ve formed that initial layer, lower the heat to medium-low. Now you can gently stir them around. Keep frying and stirring occasionally until they turn a lovely light golden brown. This usually takes about 3-4 minutes. You can even use a fork to gently poke one (carefully!) to see if it feels cooked through.
- Rest & Recharge: Scoop out the partially fried balls and let them drain on a strainer or paper towels. Let them chill for 5-7 minutes. Pro Tip: If you’re not serving right away, you can cool completely and save them for a final crisping fry later.
- Third Dip – The Crispy Grand Finale (Flash Fry!): Time for the real magic! Crank the oil heat back up to HIGH – it needs to be screaming hot. Carefully pop the rested manchurian balls back into the super hot oil. This is a quick fry – just a few seconds! Keep them moving with your stirring spoon until they turn gorgeously golden brown and achieve maximum crispiness. Hear that sizzle? That’s the sound of perfection!
- Mission Accomplished (Almost!): Your crispy Manchurian balls are DONE! Remove them from the oil and keep them aside. They’re just waiting for their saucy destiny!
Phase 2: Operation Sauce Toss (Where the Magic Happens!)
Now for the sticky, flavorful part that brings it all together. Are you going dry and clingy, or wet and wild with gravy? You decide!
The Flavor Squad (Ingredients):
- Oil: 2 tbsp (Starting off right!)
- Ginger: ½ inch, finely chopped (More zing, yes please!)
- Coriander Stems: 1 tsp, finely chopped (Don’t waste ’em, they’re flavorful!)
- Green Chilies: 1-2, chopped (Spice level: Choose your fighter!)
- Capsicum (Bell Pepper): 2 tbsp, chopped (Color, crunch, flavor!)
- Vegetable Stock / Hot Water: 100-150 ml (The base of your adventure – less for dry, more for gravy!)
- Green Chili Paste: 2-3 tsp (Double down on that chili goodness!)
- Dark Soy Sauce: 1 tbsp (Deep, rich color and flavor!)
- The Tang Factor: 1 tsp vinegar, or a happy squeeze of lemon juice, or 1-2 tsp MSG (optional, for that extra umami kick!)
- White Pepper Powder: Just a pinch (Subtle heat with an Asian twist!)
- Salt: To taste (Check before adding, soy sauce is salty!)
- Sugar: Another pinch (Balancing act!)
- Corn Flour (Cornstarch): 1 tbsp (The thickening wizard!)
- Water: 2 tbsp (To awaken the wizard!)
- Fresh Coriander Leaves: A small handful, chopped (Fresh finish!)
The Mission (Method):
- Aromatic Awakening: Heat 2 tbsp of oil in a pan or wok over high flame. Throw in the chopped ginger, coriander stems, green chilies, and capsicum. Stir-fry like a pro chef on high heat for 1-2 minutes until they smell amazing and the veggies are slightly tender-crisp.
- Liquid Party Time: Pour in your vegetable stock or hot water. Add the green chili paste, dark soy sauce, your chosen “tang factor” (vinegar, lemon, or MSG), salt (taste first!), and sugar. Give it a good stir and bring this flavorful concoction to a rolling boil.
- Wizard’s Potion (Cornstarch Slurry): While the sauce is boiling, grab a small bowl. Mix the 1 tbsp corn flour with 2 tbsp water (that’s a 1:2 ratio, wizard!). Whisk it until it’s super smooth with no lumps. This is your thickening potion!
- Thicken Up! (The Gravy/Coating Magic): Once the sauce is happily boiling, gradually pour in your cornstarch slurry while stirring constantly. Keep stirring and cooking until the sauce thickens.
- Going DRY?: You want the sauce to thicken just enough to beautifully coat the manchurian balls.
- Going GRAVY?: Cook until it forms a thicker, pourable sauce that you can happily spoon over rice!
- The Great Toss!: Now for the grand reunion! Add your super crispy fried Manchurian veggie balls to the thickened sauce. Sprinkle in the chopped fresh coriander leaves. Gently stir and toss everything together until the Manchurian veggie balls are perfectly coated in that glorious sauce. About 30-60 seconds of tossing is usually enough to get that perfect sticky coating.
- For DRY: Toss quickly! You want the sauce to cling, not drown.
- For GRAVY: Ensure the balls are well coated in the thicker sauce.
- Victory is Yours! Your Veg Manchurian (dry or saucy!) is ready! Serve it hot and watch it disappear!
Enjoy your homemade veggie awesomeness!
Leave a Reply
You must be logged in to post a comment.